



If you are an engineering student preparing for an AI internship and not sure what to build for your portfolio, this post is for you.
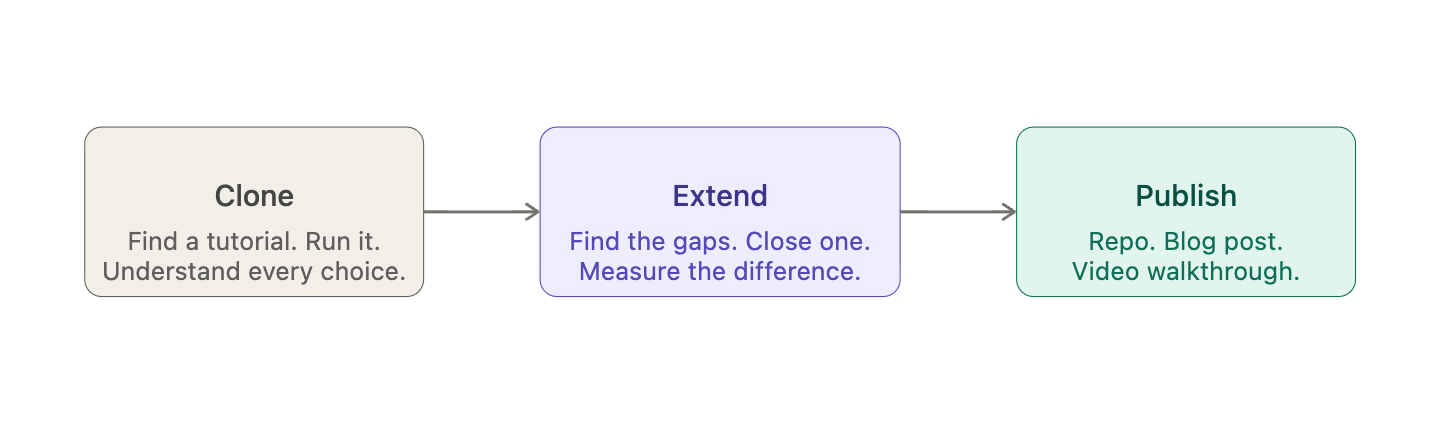
I want to share an approach that turned a single open-source tutorial into three publishable assets over a couple of weeks. It is not a shortcut. It is a deliberate process, and it taught me more than starting from scratch would have.
Where this came from
About a year ago, after a decade of working in AI and ML, I decided to learn agentic RAG properly. Not just read about it. Build something real with it.
I found a well-structured tutorial in the LangChain repo. It builds an agentic RAG system that loads web content, chunks it, indexes it for semantic search, and uses a LangGraph agent to decide when to retrieve versus when to answer directly. Clean, well-organized, a good foundation.
My first instinct was not to modify it. It was to understand the tutorial code completely.
So I ran it as written. Worked through every component. Traced each step in the workflow. Asked myself why each design choice was made, not just what it did. Why that retrieval strategy. How the agent decides when retrieved documents are relevant enough to generate an answer, and when to rewrite the query and try again. Where the boundaries between components are drawn and why.
That process took time. But it was the only reason I could later see where the gaps were. You cannot see what is missing in something you have only skimmed.
What the tutorial was missing
Once I had that foundation, the gaps became clear.
The tutorial used an in-memory vector store, fine for a prototype but not for production. It loaded content from public blog posts, useful for a demo but not connected to any real enterprise use case. There was no evaluation of retrieval quality, no baseline numbers to measure anything against, and no way to run any of it outside a Jupyter notebook.
Those were my extension targets.
I replaced the in-memory vector store with IBM Db2 as the vector database. Swapped the public blog content with a technical article I had written myself, so I could evaluate the outputs against answers I already knew. Added local embedding generation using a Granite model so the entire pipeline could run offline. Then decomposed the notebook into three production microservices: a data ingestion API, a search and generation API, and a unified gateway that runs both.
Having built RAG pipelines with my team, I can tell you that decomposition step is where most of the real engineering decisions surface. Error handling, input validation, service boundaries, modularity. None of that appears in a notebook.
My full repo is here: shaikhq/agentic-rag-db2
The framework, step by step
Here is the process in the order I followed it. It applies to any AI tutorial you want to extend, not just RAG.
Run the original first, without touching it. Understand every component and every design choice before you form an opinion about what to change. This is the step many students skip. They skim the tutorial, get the general idea, and immediately start modifying things. That is why their extensions feel shallow. Deep understanding is what lets you see the gaps.
Record baseline numbers before changing anything. Retrieval accuracy, latency, response quality, whatever is measurable for the use case. You need a starting point. Without a baseline, any improvement you make later is invisible. This is also one of the most common gaps in tutorials themselves, and closing it alone is a meaningful contribution.
Swap the data source with something real to you. Replace the tutorial’s sample data with your own content, your own domain, something you can evaluate honestly. I used a technical article I had written. The pipeline’s responses immediately became more meaningful to read because I already knew what a correct answer looked like.
Close one gap with a targeted improvement. Better retrieval logic, a smarter chunking strategy, an evaluation step the original skipped, a production-grade vector store. Pick one improvement at a time, implement it, and measure the difference against your baseline from step 2. That comparison is the substance of your portfolio, not the code alone.
Convert the notebook to APIs. This is the step that separates a prototype from something deployable. I split the notebook code into a data ingestion API and a search and generation API, then combined them behind a gateway. It forces decisions about error handling, input validation, and service boundaries that notebook code never surfaces. Most students never get there, which is exactly why it is worth doing.
Write the README while the work is fresh. Not a usage guide. A record of what you found in the original tutorial, what you changed, and what the numbers showed before and after. Include a workflow diagram. This is the document an interviewer will ask you to walk them through. Writing it also forces you to articulate what you actually did and why, which is harder than it sounds.
The two assets that most students skip
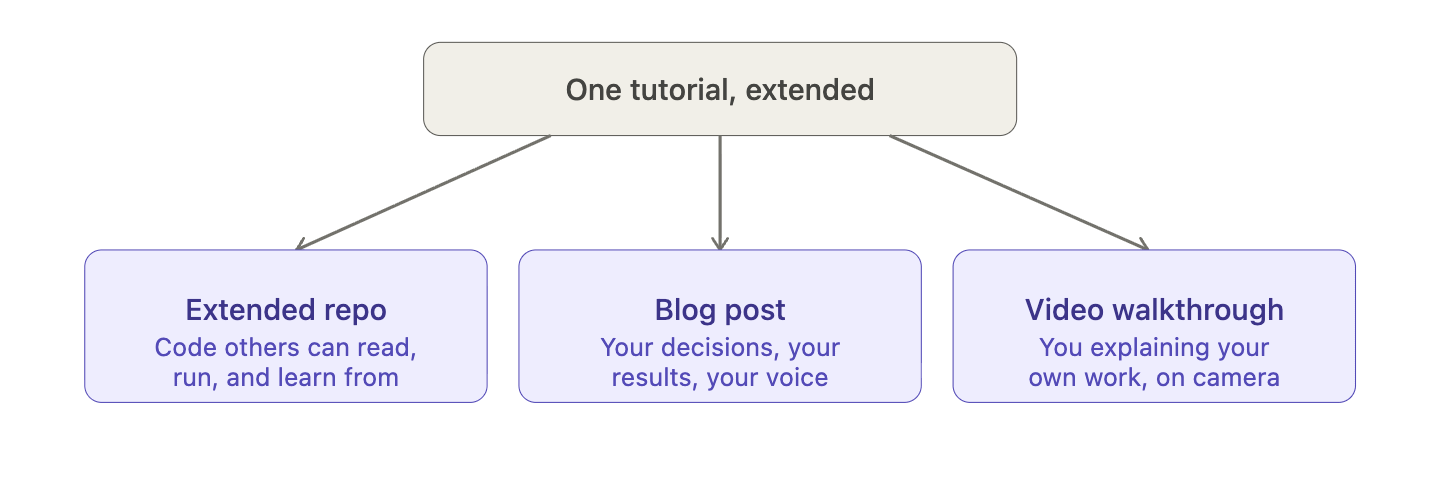
Once the code is done, produce two more assets from the same work before you close the project. These are the ones that actually get you noticed.
Write a post about what you extended and what you measured. Not a tutorial explaining the technology. Your own account of the extensions you made, what surprised you, and what the numbers showed. A hiring manager can tell the difference between a post written from experience and one assembled from documentation. This kind of writing is harder to produce from AI alone, which is exactly what makes it credible.
Record a short video walking through the repo. Many students applying for internships will not do this. I published two walkthroughs covering the above sample work: Deploying Agentic RAG to Production, Part 1: FastAPI Data Ingestion and Deploying Agentic RAG to Production, Part 2.
A hiring manager who watches three minutes of you explaining your own work has a clearer picture of how you think than one who reads a README alone.
One tutorial. A couple of weeks of deliberate work. Three assets: an extended repo, a written reflection, and a video walkthrough. Each one builds on the same foundation and tells a consistent story about how you think and work.
Why this works
The reason this approach produces better portfolio projects than building from scratch is not that it is easier. It is that it mirrors how engineering work actually happens. In any real job, you will inherit code, understand it, identify what is missing, and improve it. The tutorial gives you something to push against. The gaps give you something real to solve. The baseline numbers give you a way to show that the solution worked.
A portfolio project that shows you can do that is more convincing to a hiring manager than one that shows you can follow a course and build what the instructor built.
If you try this approach, I would be curious to hear which step felt hardest, finding a tutorial worth extending, deciding which gap to close first, or getting the post and video out after the code was done. Those are usually where people get stuck, and they are worth talking through.